I have been working with Microsoft.AspNetCore.Authentication.AzureAD.UI for authenticating with Azure AD. I noticed however that in a recent project it is now deprecated.
So I thought I’d spend some time learning the new way of integrating with Azure AD using the Microsoft Identity Platform. I was pleasantly surprised how easy it is.
Three Easy Steps
There are only 3 steps to creating a new MVC app that integrates with Azure AD
- Register the app in the Azure Portal
- Create a new MVC project with the Microsoft Identity Platform authentication type
- Copy the settings from the portal into the app and run
And that is it!
Step 1 – Register the App in Azure Portal
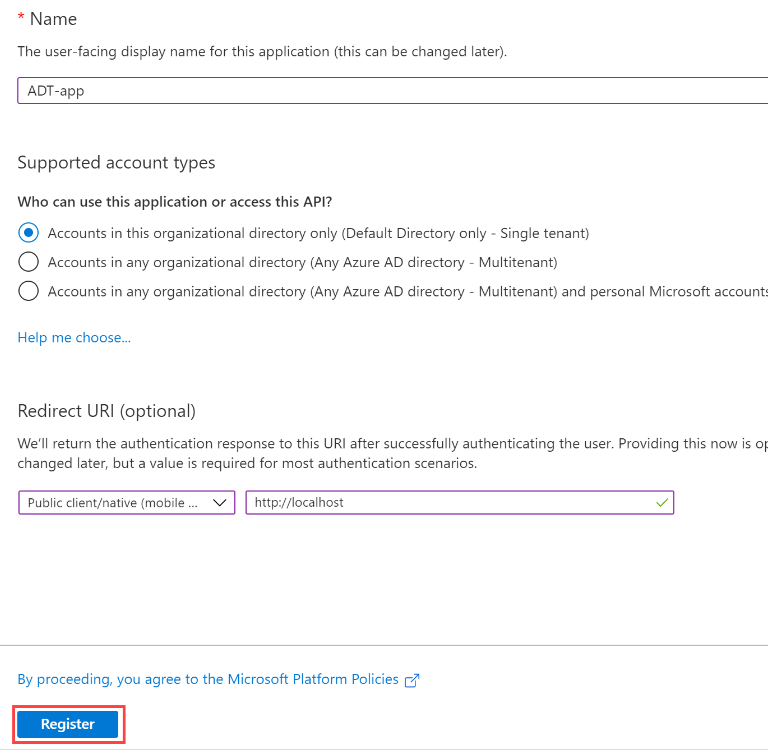
- Go to https://portal.azure.com, then to App Registrations and click New registration
- Enter the name you want to call it in Azure
- In the Redirect URL enter https://localhost:44382/signin-oidc
This will redirect back to your website when you run it locally
In production this will be your websites URI – you can have multiple URI’s. - Click Register

Make note of the Client and Tenant ID’s
You will need both the client ID and tenant ID to put into your web application (see below).

Step 2 – Create a new MVC Project
Now this is where things get really easy.
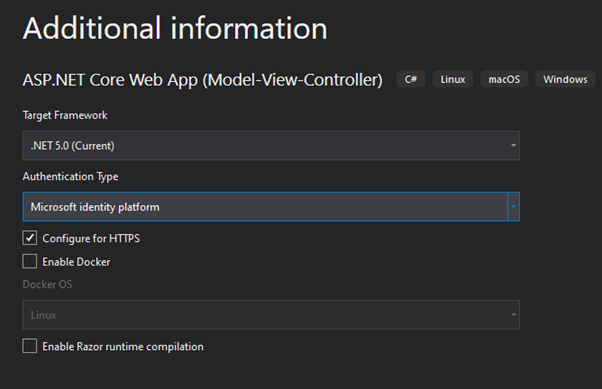
Create a new ASP.NET Core web App.

On the third page set the Authentication Type to Microsoft Identity platform.

Choosing Microsoft Identity platform as the authentication type will include the packages for your integration with Azure AD.
Click create.
Step 3 – Copy the Portal Settings Into the Project
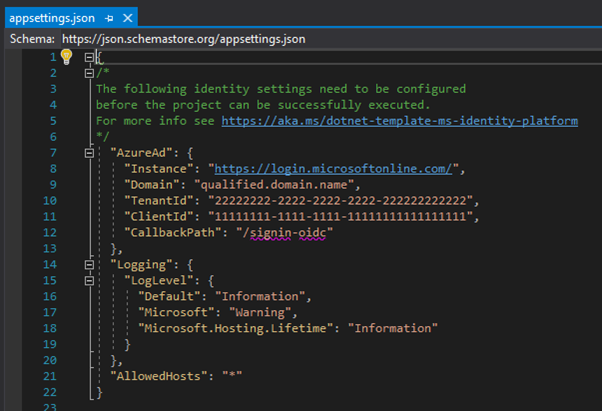
When the project opens it opens the appsettings.json.

Add your domain
Get your TenantId and ClientId from the App Registration in the portal (see image above) and paste into the appsettings
Done!
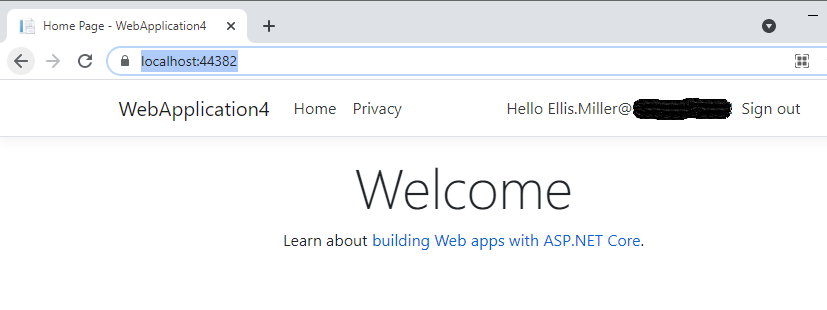
And that is how easy it is, simply run the application, and log in.
