In PowerApps a Choice field always shows as a dropdown, even when you select the ‘Checkboxes (allow multiple selections)’ option. This article is about how to change the default dropdown to a list of checkboxes.
I have seen several ways of creating checkbox multivalued lists, but this way is, in my opinion, the most elegant solution.
Overview
For the base of the list I have used a Gallery control, which gives you plenty of formatting options. And as a data source I have used a collection.
The Data Source
Here is what the field in my data source looks like…
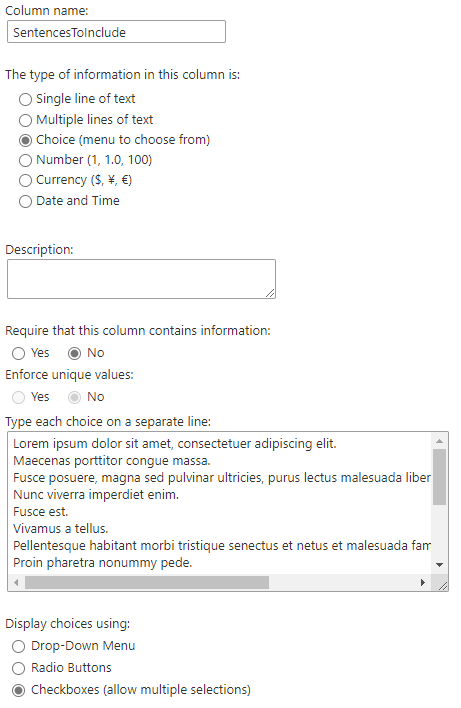
Step 1 – Setting up
Create your data source (List with Choice field and values) and your form. My basic one looks like this…
Step 2 – Create the Collection
I don’t claim to know that much about PowerApps, I’m just a Code Jockey who has been asked to work with it, but a lot of stuff in PowerApps can only be done by code (well. script). Collections seems to be one of those things.
Collection Overview
A collection is just that, a collection of values or multivalues (rows of values).
Add this code to your App OnStart event to create a collection with three fields…
Collect(colMultivaluedCollection, {Field1: "a", Field2: "b", MyValue: false});Now if you view your data sources you will see that the collection exists as a data source.
If you go to File -> Collections you will see the collection there also, but you will also see the fields and the values of the first 5 rows.
Note this is just an example, remove when done.
Create the Collection
For this tutorial we will add the following code to the Screen OnVisible event…
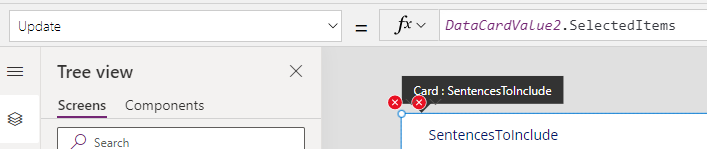
Collect(colSentencesSelected, {Value: ""});Change the Update property on the parent DataCard to update your collection (should simply read colSentencesSelected).
Step 3 – Add the Gallery
To add a control inside another control use the Insert Panel (rather than the toolbar) and drag the control, in this case a gallery, over the control you want to add it to, in this case the DataCard.
Set the Items property on the gallery to the choices in the field, like so…
Choices([@'MultivaluedCheckboxListExample'].SentencesToInclude)Note that MultivaluedCheckboxListExample is my data source (list) name and SentencesToInclude is the field name.
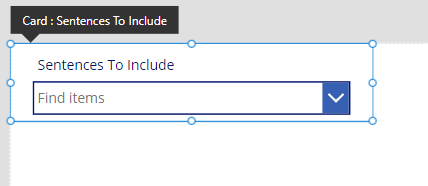
Delete all the controls inside the gallery except the Separator.
This should leave your control looking something like this…
Yeah, it’s just a blank control, but it’s a start.
As you can see I’ve left the dropdown in the DataCard, it gets deleted in step 5.
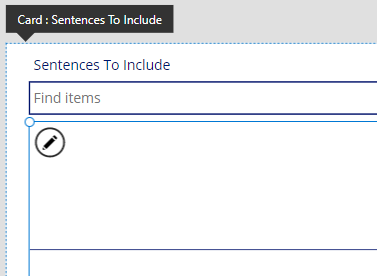
Step 4 – Add the Checkbox to the Gallery
Drag a Checkbox into the Gallery (make sure it’s in the gallery) and set its position etc.
Set the Text property to ThisItem.Value, this will now show each item in your Choices.
Set the OnCheck property to Collect(colSentencesSelected, {Value: Self.Text});, this adds the text to the collection.
Set the OnUnckeck property to Remove(colSentencesSelected, {Value: Self.Text});, this removes the text from the collection.
And it should now look like this…
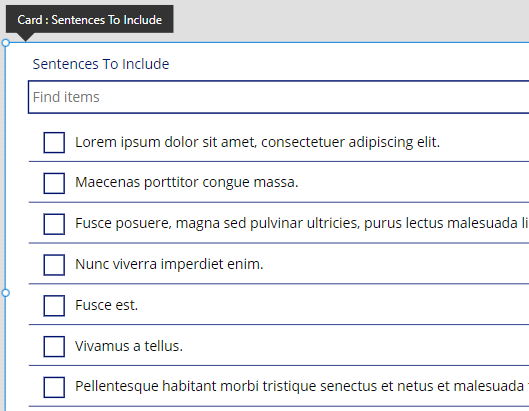
Step 5 – Tidy Up
Delete the existing dropdown box.
Fix the one error which will be the Y of the Error message control. Set it to galSentences.Y + galSentences.Height, that is it sits underneath your gallery. Where galSentences is my gallery name.
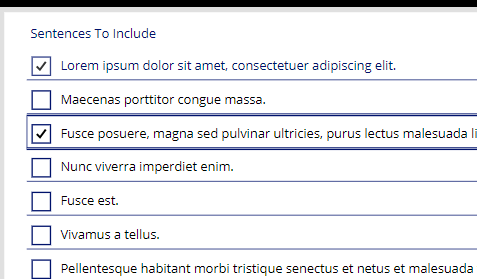
And this is the finished product
Resetting the control
If you want to reset the control (remove all checks) then…
On the event that resets the form, i.e. Submit, or Reset button call Clear(colSelectedLTPLinks); this will clear the collection, but it won’t reset the checkboxes (nor will the ResetForm function).
To reset the checkboxes add this code to the Reset property on the checkbox…
If(CountRows(colSentencesSelected) <= 0, true, false)What this does is reset the control if the collection is empty, which it will be because of the clear function.
Making the field Required
There seems to be a small problem with making the field required, that is, the underlying field doesn’t pick up changes to the collection. So here is a workaround.
Add this to the Required property on the parent DataCard…
If(CountRows(colSentencesSelected) = 0, true, false)This will simply make the field required when the collection is empty, and not required when the collection has values.
Troubleshooting
If the form does not save
- Do you have all the required fields listed in the data source provided?
- If the checkbox list is the required field, have you added the Required fix?
- Has the collection been added to the DataCard Update property (step 2)?
There are errors on the DataCard
Click on the error bubble to show the error in the function bar, this helps immensely.
- If the property is Update, change the function text to the collection (see step 2)
- If the property is Y, update the function text to have the control under the gallery (see step 5)
Do note that you only see one error at a time, when that is resolved you will see the next error.
The control won’t reset
It is likely because you haven’t either cleared the collection of set the Reset property on the checkbox, see Resetting the control above.